MitySOM-AM62 CSI-2 Camera Capture
The AM62x and AM62p is able to stream image data from MIPI/CSI-2 cameras capable of generating images with YUV or RGB colorspace output. The AM62x does not include hardware based debayering / Image Signal Processing (ISP) accelerators.
This example outlines examples streaming or capturing image data from a couple of off-the-shelf cameras.
The connector interface on the MitySOM-AM62 Development kit is intended to be compatible with the Raspberry Pi zero 22-pin 0.5 mm pitch interface. Connections for MIPI cameras utilizing the Raspberry Pi 15 pin 1.0mm pitch interface can be made with a 15-pin to 22-pin flex cable adaptor, such as the Arducam Raspberry Pi Camera Cable.
Video streaming is supported across a range of resolutions, starting from 120p at 30fps and scaling up to 1944p at 15fps.
Using a Digilent PCAM 5C Camera
The Digilent PCAM 5C camera is a 5MP camera based on the ov5640 sensor from Omni-Vision.
Connect the camera.
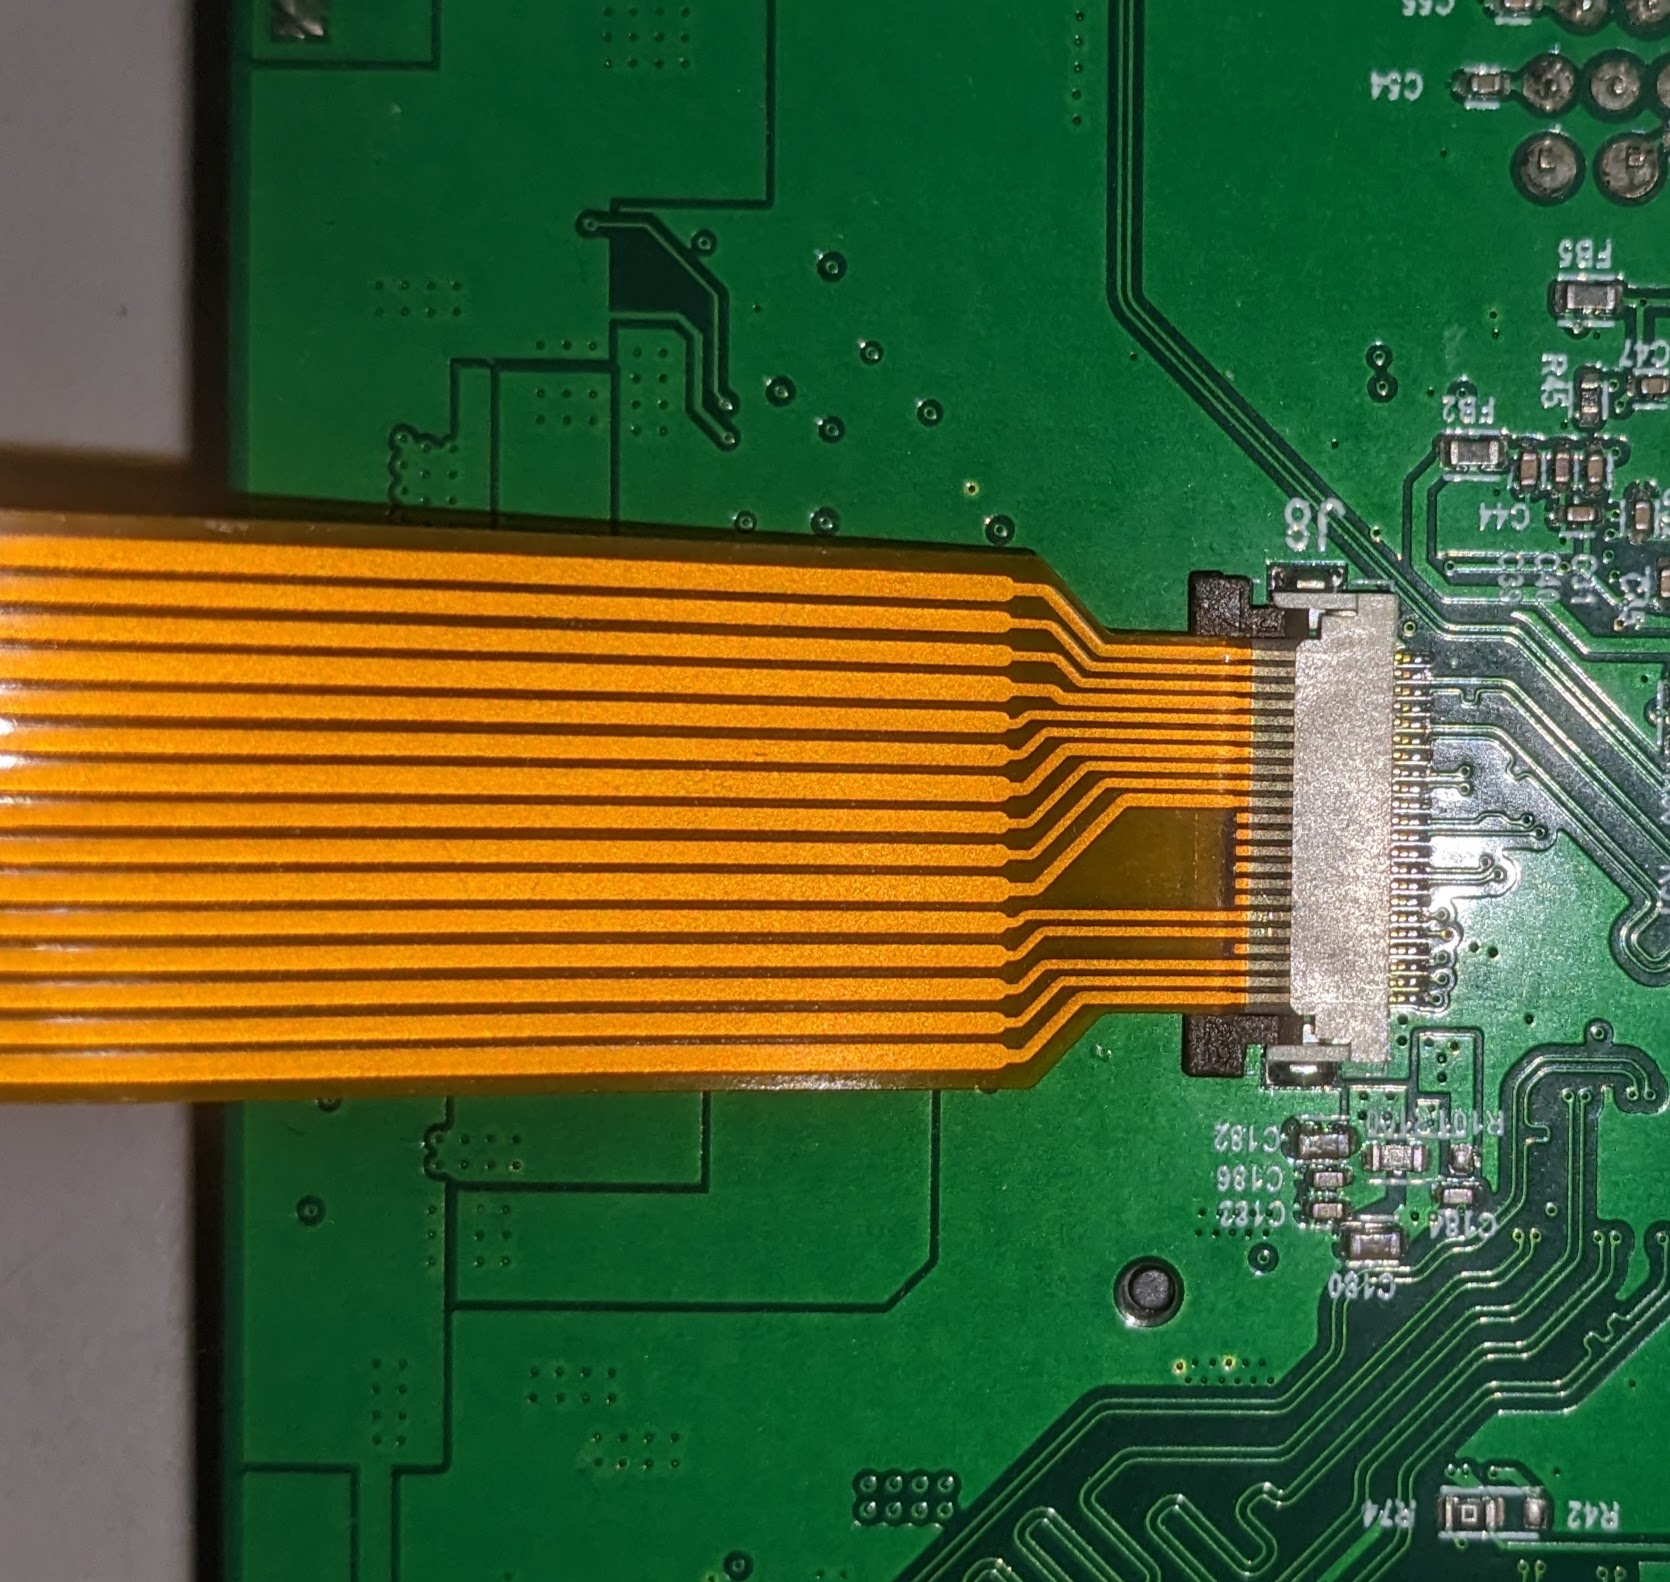
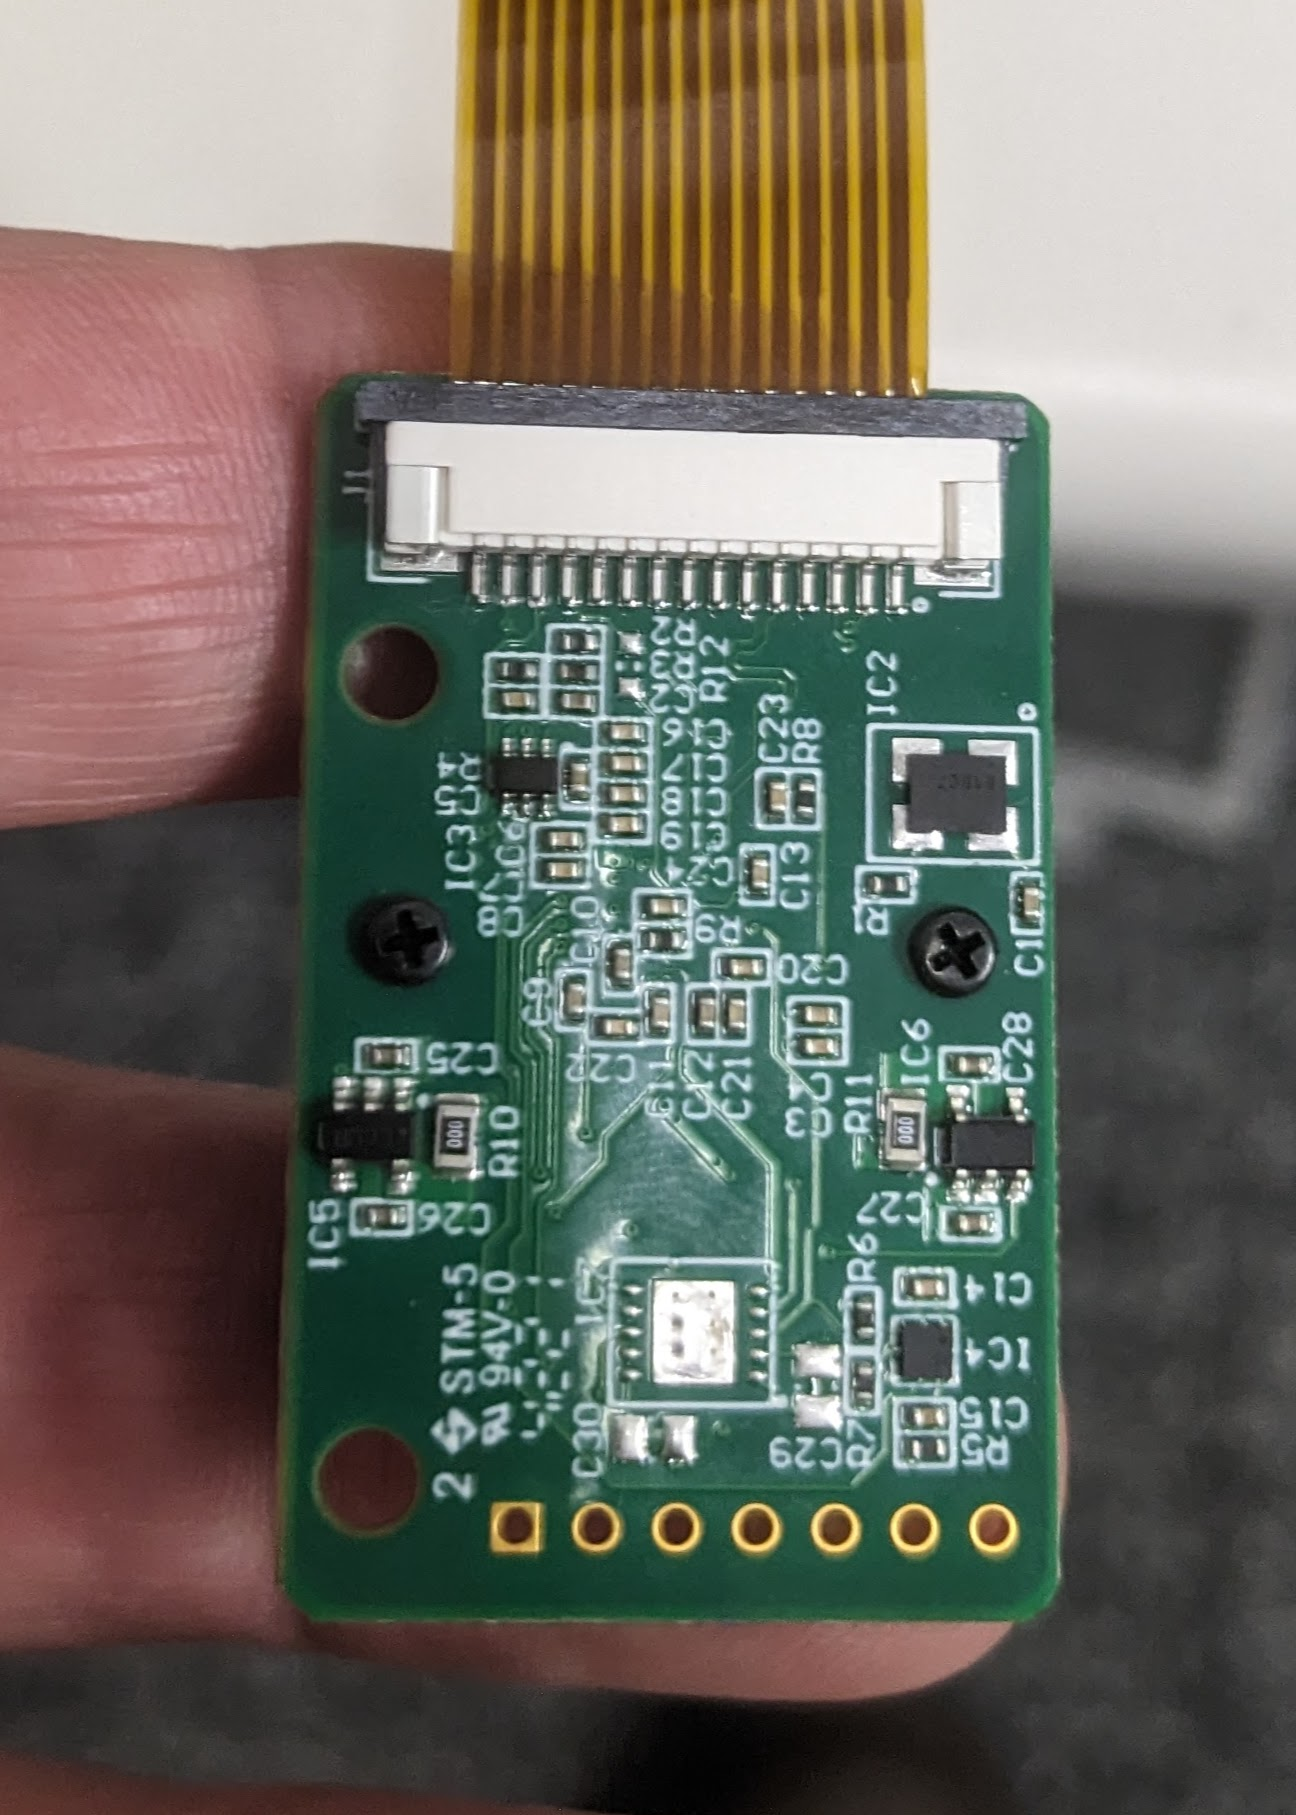
The pictures below show the connections for the camera to the development kit using the Arducam adapter cable. Note that the conductors must be on the top side of the MitySOM-AM62 evaluation board interface.


Configure to use the MitySOM-AM62 Development Kit OV5640 Overlay
Add this line to /run/media/boot-mmcblk1p1/uEnv.txt and reboot:
For the AM62xname_overlays=k3-am625-mitysom-ov5640.dtbo
For the AM62pname_overlays=k3-am62px-mitysom-ov5640.dtbo
Option 1: TI Demo
The TI default Demo comes with a live camera stream demo, which can detect the camera and stream it to the screen. Simple select "Live Camera" and the stream should start.
Option 2: GStreamer through Wayland
640x480, 30 Hz
media-ctl -d 0 --set-v4l2 "'ov5640 1-003c':0 [fmt:UYVY/640x480]"; media-ctl -d 0 --set-v4l2 ''\''cdns_csi2rx.30101000.csi-bridge'\'':0 [fmt:UYVY/640x480]'; media-ctl -d 0 --set-v4l2 ''\''30102000.ticsi2rx'\'':0 [fmt:UYVY/640x480]'
gst-launch-1.0 v4l2src device="/dev/video0" ! video/x-raw, width=640, height=480, format=UYVY ! autovideosink
1024x768, 30 Hz
media-ctl -d 0 --set-v4l2 "'ov5640 1-003c':0 [fmt:UYVY/1024x768]"; media-ctl -d 0 --set-v4l2 ''\''cdns_csi2rx.30101000.csi-bridge'\'':0 [fmt:UYVY/1024x768]'; media-ctl -d 0 --set-v4l2 ''\''30102000.ticsi2rx'\'':0 [fmt:UYVY/1024x768]'
gst-launch-1.0 v4l2src device="/dev/video0" ! video/x-raw, width=1024, height=768, format=UYVY ! autovideosink
Streaming at higher resolutions using a single command
For this example a 1080p resolution is used.
gst-launch-1.0 libcamerasrc ! video/x-raw, width=1920, height=1080, format=UYVY ! autovideosink
Option 3: GStreamer through KMS
640x480, 30 Hz
systemctl stop weston.socket; systemctl stop weston
media-ctl -d 0 --set-v4l2 "'ov5640 1-003c':0 [fmt:UYVY/640x480]"; media-ctl -d 0 --set-v4l2 ''\''cdns_csi2rx.30101000.csi-bridge'\'':0 [fmt:UYVY/640x480]'; media-ctl -d 0 --set-v4l2 ''\''30102000.ticsi2rx'\'':0 [fmt:UYVY/640x480]'
gst-launch-1.0 v4l2src device="/dev/video0" ! video/x-raw, width=640, height=480, format=UYVY ! queue ! kmssink driver-name=tidss plane-properties=s,zpos=1
1024x768, 30 Hz
systemctl stop weston.socket; systemctl stop weston
media-ctl -d 0 --set-v4l2 "'ov5640 1-003c':0 [fmt:UYVY/1024x768]"; media-ctl -d 0 --set-v4l2 ''\''cdns_csi2rx.30101000.csi-bridge'\'':0 [fmt:UYVY/1024x768]'; media-ctl -d 0 --set-v4l2 ''\''30102000.ticsi2rx'\'':0 [fmt:UYVY/1024x768]'
gst-launch-1.0 v4l2src device="/dev/video0" ! video/x-raw, width=1024, height=768, format=UYVY ! queue ! kmssink driver-name=tidss plane-properties=s,zpos=1
Using controls
The OV5640 and driver does have V4L2 controls to allow generation of test patterns as well as flipping X and Y on the output:
root@mitysom-am62x:~# v4l2-ctl -L -d /dev/v4l-subdev2

User Controls

                       contrast 0x00980901 (int)    : min=0 max=255 step=1 default=0 value=0 flags=slider
                     saturation 0x00980902 (int)    : min=0 max=255 step=1 default=64 value=64 flags=slider
                            hue 0x00980903 (int)    : min=0 max=359 step=1 default=0 value=0 flags=slider
        white_balance_automatic 0x0098090c (bool)   : default=1 value=1 flags=update
                    red_balance 0x0098090e (int)    : min=0 max=4095 step=1 default=0 value=0 flags=inactive, slider
                   blue_balance 0x0098090f (int)    : min=0 max=4095 step=1 default=0 value=0 flags=inactive, slider
error 121 getting ctrl Exposure
                 gain_automatic 0x00980912 (bool)   : default=1 value=1 flags=update
                horizontal_flip 0x00980914 (bool)   : default=0 value=0
                  vertical_flip 0x00980915 (bool)   : default=0 value=0
           power_line_frequency 0x00980918 (menu)   : min=0 max=3 default=1 value=1 (50 Hz)
                                0: Disabled
                                1: 50 Hz
                                2: 60 Hz
                                3: Auto

Camera Controls

error 121 getting ext_ctrl Auto Exposure

Image Source Controls

              vertical_blanking 0x009e0901 (int)    : min=24 max=2895 step=1 default=600 value=600
            horizontal_blanking 0x009e0902 (int)    : min=1256 max=1256 step=1 default=1256 value=1256 flags=read-only
error 121 getting ext_ctrl Analogue Gain

Image Processing Controls

                 link_frequency 0x009f0901 (intmenu): min=0 max=22 default=13 value=13 (384000000 0x16e36000) flags=read-only
                                0: 992000000 (0x3b20b800)
                                1: 888000000 (0x34edce00)
                                2: 768000000 (0x2dc6c000)
                                3: 744000000 (0x2c588a00)
                                4: 672000000 (0x280de800)
                                5: 672000000 (0x280de800)
                                6: 592000000 (0x23493400)
                                7: 592000000 (0x23493400)
                                8: 576000000 (0x22551000)
                                9: 576000000 (0x22551000)
                                10: 496000000 (0x1d905c00)
                                11: 496000000 (0x1d905c00)
                                12: 384000000 (0x16e36000)
                                13: 384000000 (0x16e36000)
                                14: 384000000 (0x16e36000)
                                15: 336000000 (0x1406f400)
                                16: 296000000 (0x11a49a00)
                                17: 288000000 (0x112a8800)
                                18: 248000000 (0xec82e00)
                                19: 192000000 (0xb71b000)
                                20: 192000000 (0xb71b000)
                                21: 192000000 (0xb71b000)
                                22: 96000000 (0x5b8d800)
                     pixel_rate 0x009f0902 (int64)  : min=48000000 max=168000000 step=1 default=48000000 value=48000000 flags=read-only
                   test_pattern 0x009f0903 (menu)   : min=0 max=4 default=0 value=0 (Disabled)
                                0: Disabled
                                1: Color bars
                                2: Color bars w/ rolling bar
                                3: Color squares
                                4: Color squares w/ rolling bar
root@mitysom-am62x:~#  v4l2-ctl --set-ctrl=test_pattern=3 -d /dev/v4l-subdev2
root@mitysom-am62x:~#  v4l2-ctl --set-ctrl=horizontal_flip=1 -d /dev/v4l-subdev2
Using a Raspberry Pi-2 Camera
The Raspberry Pi-2 camera is an 8MP camera based on the imx219 sensor from Sony. The imx219 only presents data as raw pixels (bayer pattern), so the camera cannot be directly streamed to the display as there is no ISP on the AM62x platform to perform the colorspace conversion. This feature is avalable on the AM62xa, see this page for more info. However, you can still capture a single image and either display it on screen, or save it to disk:
Configure overlay
Add this line to /run/media/boot-mmcblk1p1/uEnv.txt and reboot:name_overlays=k3-am625-mitysom-imx219.dtbo
Take and display image:
systemctl stop weston
media-ctl --set-v4l2 '"imx219 1-0010":0[fmt:SRGGB8/1920x1080]' ; media-ctl -d 0 --set-v4l2 ''\''cdns_csi2rx.30101000.csi-bridge'\'':0 [fmt:SRGGB8/1920x1080]'; media-ctl -d 0 --set-v4l2 ''\''30102000.ticsi2rx'\'':0 [fmt:SRGGB8/1920x1080]'
gst-launch-1.0 v4l2src device="/dev/video0" num-buffers=1 ! video/x-bayer, format=rggb, width=1920, height=1080 ! bayer2rgb ! imagefreeze ! kmssink driver-name=tidss plane-properties=s,zpos=1
Take and save image to image.jpg:
media-ctl --set-v4l2 '"imx219 1-0010":0[fmt:SRGGB8/1920x1080]' ; media-ctl -d 0 --set-v4l2 ''\''cdns_csi2rx.30101000.csi-bridge'\'':0 [fmt:SRGGB8/1920x1080]'; media-ctl -d 0 --set-v4l2 ''\''30102000.ticsi2rx'\'':0 [fmt:SRGGB8/1920x1080]'
gst-launch-1.0 v4l2src device="/dev/video0" num-buffers=1 ! video/x-bayer, format=rggb, width=1920, height=1080 ! bayer2rgb ! jpegenc ! filesink location=image.jpg
Go to top

